 Lucy's stocking last year was a cute pink "Baby's 1st Christmas 2010" stocking given to her by her Grand-dad, but this year I wanted to make her a unique stocking that had more of a Christmas feel. I have been making things with old wool sweaters this season and had quite a few scraps left, and thought that would make a cozy, festive wool stocking! I traced a stocking shape from one of ours that I like the shape of. Then I cut the paper stocking into shapes for a pattern and left about a 1/2 inch around all sides for a seam allowance. The whole process of making the pattern and sewing it together took less than an hour and was very easy. I love how it turned out and it looked even better full of presents!
Friday, December 30, 2011
Wool Christmas Stocking
Lucy's stocking last year was a cute pink "Baby's 1st Christmas 2010" stocking given to her by her Grand-dad, but this year I wanted to make her a unique stocking that had more of a Christmas feel. I have been making things with old wool sweaters this season and had quite a few scraps left, and thought that would make a cozy, festive wool stocking! I traced a stocking shape from one of ours that I like the shape of. Then I cut the paper stocking into shapes for a pattern and left about a 1/2 inch around all sides for a seam allowance. The whole process of making the pattern and sewing it together took less than an hour and was very easy. I love how it turned out and it looked even better full of presents!Friday, December 23, 2011
30 Sucks.
I saw this project on Pinterest a while back and kept the idea in the back of my head, knowing that I would have to have a friend turning a milestone birthday sometime in the near future. Well, I had a friend turn the 30 last week. So about a month ago I set out to make the "30 Sucks" sucker bouquet. I went a fairly easy route- Bought a block of florists foam and 2 bags of Blow Pops. Then I used 2 colored paperbags I had on hand cover the foam block. I think next time I would use wrapping paper, but I was impatient and excited to make it and I liked the bright pink. I used my new Cricut machine to cut "30 SUCKS." out of scrapbook paper and to make a little Happy Birthday card. Using an exacto knife, I cut 30 slits in the top of the bags/block and stuck in the suckers. Around the suckers I stuffed crinkle cut paper shreds(the kind you use in gift bags)... and Voila!

I thought it turned out very cute and hopefully it brightened her day for the dreadful 30.

I thought it turned out very cute and hopefully it brightened her day for the dreadful 30.
Sunday, December 4, 2011
DIY Christmas Wreaths
We offer a wreath making class at our greenhouse and I went Saturday to join in. It was quite intimidating in the beginning. Of course, I was late and the other ladies were deep into the process. They were clipping greenery, bundling, wrapping with wire, using a variety of supplies and I was clueless! But I collected all my materials, observed some of the others, and jumped right in. It was actually a lot of fun and turned out much better than I expected! There were some ladies in the class that have been coming to the class for years even though they are nearly wreath making experts, so that they have all the supplies provided in a festive location. Their wreaths were incredible!

I have never bought a fresh wreath (I have a cheap fake one that I have used for years) but I don't think I ever will buy one- I will just make it from now on! I wish I would have taken some pictures during the process to share with everyone, but maybe it is good I didn't so that next year I can gather a group of friends to take the class with me!

I have never bought a fresh wreath (I have a cheap fake one that I have used for years) but I don't think I ever will buy one- I will just make it from now on! I wish I would have taken some pictures during the process to share with everyone, but maybe it is good I didn't so that next year I can gather a group of friends to take the class with me!
Sunday, November 13, 2011
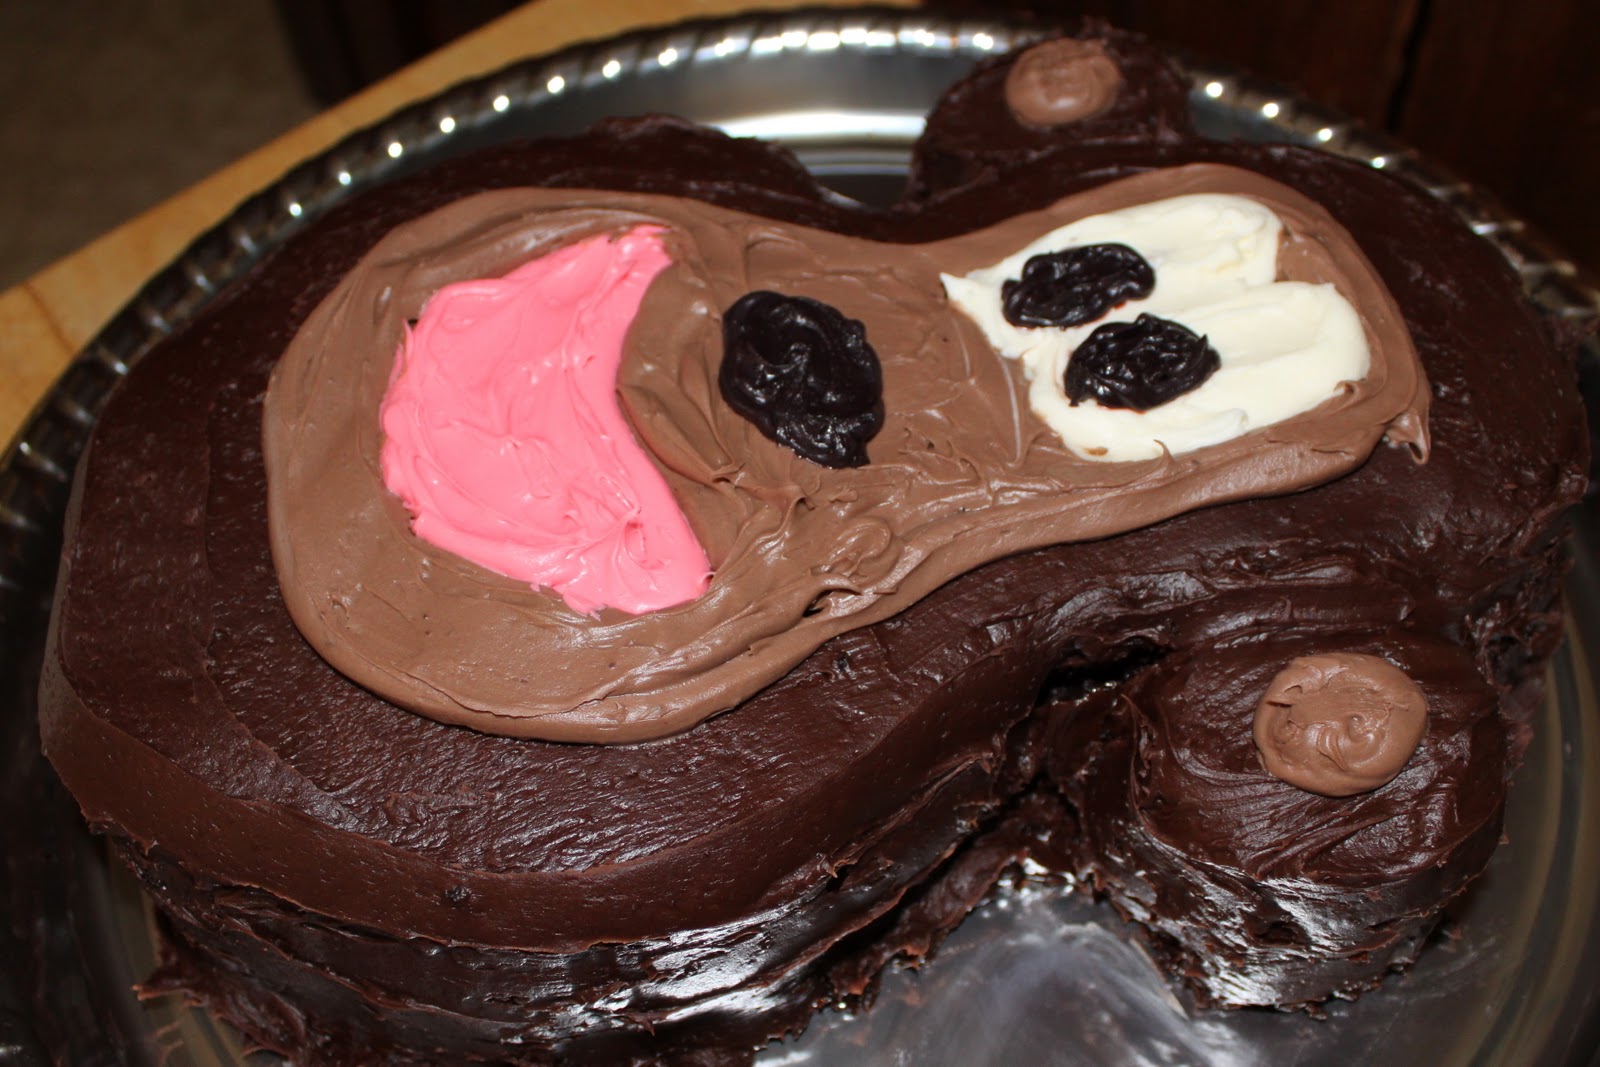
Monkey Birthday Party!
I just realized how long it has been since I posted last. I guess it is evident that I have been chasing around my little crawler who has now turned 1! I have also been working on a lot of things for her birthday party and didn't want to reveal them until party time. So here we are!


Lucy's Monkey Cake...
Cupcakes...

Lucy's "Smash" cake that didn't end up very smashed. Turns out Lucy doesn't like to be very messy. We will see how long that lasts!

Lucy's 12-month photo banner and a "1" collage of her photos...

Lucy's Birthday Banner and Hand-cut monkeys!

Table decorations...

Lucy's "1" Onesie...

This posting is sponsored, in part, by friends and family that gave Lucy toys for her birthday that have allowed her to be occupied/distracted long enough for me to upload these photos!
Saturday, September 3, 2011
Yard Sales with a Purpose.
 Rudy and I LOVE yard sales. For years we would go with no plan in mind. We would end up with all sorts of random crap that will end up in our own yard sale someday soon. We moved this past spring and realized we have way too much random, underutilized crap. So we decided from now on we would yard sale with a distinct purpose and made a little list of items we would search for at yard sales. If it isn't on the list, there has to be a very compelling reason to purchase it. The things on our list aren't really need right away, just things we would like to have if they are the right price or that we will need within the next year. It is kind of like a treasure hunt list. Some of the things we have found this year so far was a Chicco hook-on travel highchair ($4), a microwave ($8), and today's find was a lot of 13 wooden embroidery hoops for $4!! I have a great craft in mind for the hoops, so as soon as I am able to I will share the finished product.
Thursday, August 11, 2011
Beer Bread
I made this recipe last night that I found in a HyVee circular. It turned out much better than I ever expected! I have tried making bread from scratch in the past and it always ended up too salty or too bland or didn't rise at all. This might have had a little too much butter for my arteries, but I will certainly try it again. I just used a Bud Light because that is what I had on hand, but I next time I might try a flavored craft beer.... Bent River Jalapeno Beer Bread anyone?

Monday, August 8, 2011
Freezer Paper Fabric Printing

 This has to be one of the coolest crafts I have ever made. Mainly because it is so easy and it has such a great outcome! All you need is:
- Freezer Paper (not wax or parchment, but paper with a plastic coating on one side)
- Iron
- Fabric Paint
- Foam Paint Brush
- Exact-o-knife
- Pen or Pencil
- Fabric item of your choice (I used one of Lucy's onesies)

 After it was ironed on, I used purple fabric paint in the fabric exposed areas. The paint directions say to dry for 4 hours, but since it is spread out and I am impatient, I probably only left it for about 2-3 hrs. Then I pulled all the paper off and viola! I LOVE the outcome. I ended up making two and will probably make a lot more once I get more colors. I also plan to make some shirts and things for Rudy and myself.
Wednesday, July 27, 2011
Bacon Wrapped Crab and Cream Cheese Stuffed Jalepenos
While looking through some old photos I found this one and just HAD to share it. It is making my mouth water and tummy growl a little. I actually made these sometime in early June. The picture doesn't do them justice, but trust me, they are so incredibly tasty!

10 jalepenos cut lengthwise in half; tops, seeds and veins removed
1 package of immitation crab meat; chopped into small pieces
1 8oz package of cream cheese
10 pieces of bacon; cut in half
Dash of black pepper to taste
Mix the crab, cream cheese, and pepper together in a bowl. Fill the jalapeno halves with the cream cheese mixture. wrap half a slice of bacon around the stuffing and jalapeno. Put them on the top shelf of a grill, filling side up, and cook them until bacon is crispy.
YUM!
Monday, July 18, 2011
Milk Jug Case
I found this "lunch box" made out of a plastic milk jug on Pinterest. Since we have quite a few infant water jugs siting around waiting to head out to recycling, I decided to give this a shot. It was really easy to cut the plastic, although I didn't cut very evenly. And I already had some self-adhesive velcro dots in my sewing supplies.


Now I just need to decide what I will use it for. Perhaps pencils, crayons, small toys, brownies, cookies, or carrots?
Sunday, July 17, 2011
The Expedit
Several years ago my husband bought me the most fabulous shelving unit for my craft room. The extraordinarily large, 6ft x 6ft IKEA Expedit Bookcase. It weighs 213lb, has about 100 pieces, and took me a couple hours and several bruises to assemble. Then 6 months later, we moved. The movers were able to easily get it out of our house, but after a 1/2 hour of trying, they had no luck in getting up the stairs to our 2nd story, 1 bedroom, downtown apartment. So off my new, cool shelf went to our storage unit to live for over 2 years.
Well, about 2 months ago we moved into a house and I was so excited for us to be reunited. Until we tried getting it into the house. Since our box-spring wouldn't fit, we knew the IKEA shelf wouldn't either. So here is the dilemma: do we concede to be beat by the bookcase and just make it into a piece of garage furniture? Or do we disassemble it with the hope that we can get it back together again in the room of our desire? After much debate, we decided to tackle the reassembly.
Much to our surprise, it was very easy! Unassembly went very fast, and reassembly wasn't that bad either. So here we have it...

Now it is time to work on organization of all my craft supplies!
Wednesday, July 6, 2011
Paper Bag Mini-Album
Years ago I used to teach kids how to make paper lunch bags into all sorts of things, including scrapbooks. I would always start a sample, but never really finish it because it was just a sample to show them the concept and I didn't want to give them something they would try to copy. I would hole punch the binding and lace it together using yarn. Well the other day I had my sewing machine out and decided it might be fun to try making a mini-album out of paper bags similar to the ones I made with the kids.

I used an overlock stitch to bind together three folded bags. The stitch messed up a little from going through the thick layers, but I like the haphazard look it created. I alternated the bags directions so the flaps and openings of the bags would be mixed up to create a more interesting booklet of pages.

Since the bag openings make great pockets, I knew I wanted to put something in them. I found some tulle left over from a tutu I made for Lucy and I sewed a picture on an index card to give it some stability and tulle on the end of it that sticks out of the pocket for decoration. This album was made out of three bags, therefore it has three pockets and three picture/tulle cards.

To sew the pictures directly onto the bag pages I used a basic straight stitch about an quarter inch off the edge. Under the flaps I have written a few words about the pictures on the pages or general characteristics of Lucy inspired by the photos. I used some decorative rub-on transfers and letters for the cover and to add thematic color to the pages.

I'm not completely finished with this album. I still need pictures for two of the pages, but I was so excited about it and how it is shaping up that I just couldn't wait to share it.
Friday, July 1, 2011
Tags, tags, and more tags.
Pre-motherhood I would see those Taggie blankets, clothes, etc. and wonder why in the world that company makes so much money on that stuff and who would buy that for their kid. Then Lucy turned 6 months and tags were no longer safe. She can find a tag on anything and get it into her mouth.
So last weekend I decided that I could just make a taggie mini-blanket myself so that she could chew and slobber all over that and it would be easier to clean than the awkward shaped stuff with tags: stuffed animals, wrist rattles, and the toys on her exersaucer. Off I went to my bin of fabric, of which I have way too much, and out I pulled a colorful piece of duck fabric and bright pink scrap of terry cloth, both of which I used earlier this year to make bibs and burp cloths. Then I selected four different colorful ribbons to make into "tags"and I got to sewing.


I was quite proud of my creation and immediately gave it to little Lucy, knowing that she would be in 7th heaven with so many tags! I was envisioning the cute pictures of her over the years as she would have her little home-made taggie by her side. She took it, looked at it, and threw it to the side while reaching for a tag on her pink plaid Scooby-doo. Oh well. I was glad my time investment was minimal and financial investment even less. And I had decided I would not blog about my little creation because it was a failure.
Well about 10 minutes ago she picked it up on her own! She has since put it down, but maybe there is some hope! Maybe it wasn't a complete waste of time and effort. Who knows! If you see pictures of her in the months to come with her little homemade taggie, then you will now know where it came from and that she has finally warmed up to it. Otherwise, tuck in your tags, none are safe from Lucy!
Sunday, June 26, 2011
The Reading Corner

So off we went to the local Big Box hardware store to look for shelving. First we thought we would use a 1"x 3" and attached a 1"x 1" to give it a lip to keep the books from sliding of the edge. Then we decided to get the 1"x 3" and wait until we could borrow a router from someone to make a ridge... then Rudy had the brilliant idea of using a piece of trim that already had a little ridge and was also finished in white, which matches most of her furniture in her room. Brilliant! So we bought two 8' pieces of Marco trim, eight little L brackets, and a pack of tiny screws and off we went.
Today, Rudy got to cutting, sanding, and installing the new, slim shelves in Lucy's room. It really only took a few minutes and I LOVE the result! If there weren't so many darn windows in her room, then I would do a whole wall with these. Now I want to get her a little bean bag chair and maybe a small, fun rug to set the corner off as a special area.
Saturday, June 25, 2011
Wanna play Twister.... on the elevator?


Please forgive he poor photo quality. I took these pictures with my phone and the camera lens is pretty scratched up.
Monday, June 20, 2011
Father's Day Candy Arrangement

Saturday, June 18, 2011
Mi Familia

My little family consists of me, my husband Rudy, and my little daughter Lucy. I just love this photo. We took it on Mother's Day in front of the house we just moved into. We used the timer feature with our Canon Rebel T1i on a tripod to take it. When Lucy was born we decided that investing in a nicer camera would be better than numerous trips to the portrait studio and so far, I am very happy with the decision we made! We have had one portrait studio visit at 3 months and the pictures were really nice, but pricey.
I am here!
I have been talking about starting to blog for years and just decided to bite the bullet and do it! A great way to spend a Saturday afternoon.
Subscribe to:
Posts (Atom)